Artekit AK-DS2480B-UART
User manual for the Artekit AK-DS2480-UART, 1-Wire Master-UART/RS232 Bridge.
Introduction
The Artekit AK-DS2480B-UART is a UART to 1-Wire bridge with bidirectional protocol conversion that you can use to interface with a wide range of 1-Wire devices, like sensors, memories, authentication devices, data loggers, iButton (ex Dallas Button) and others.
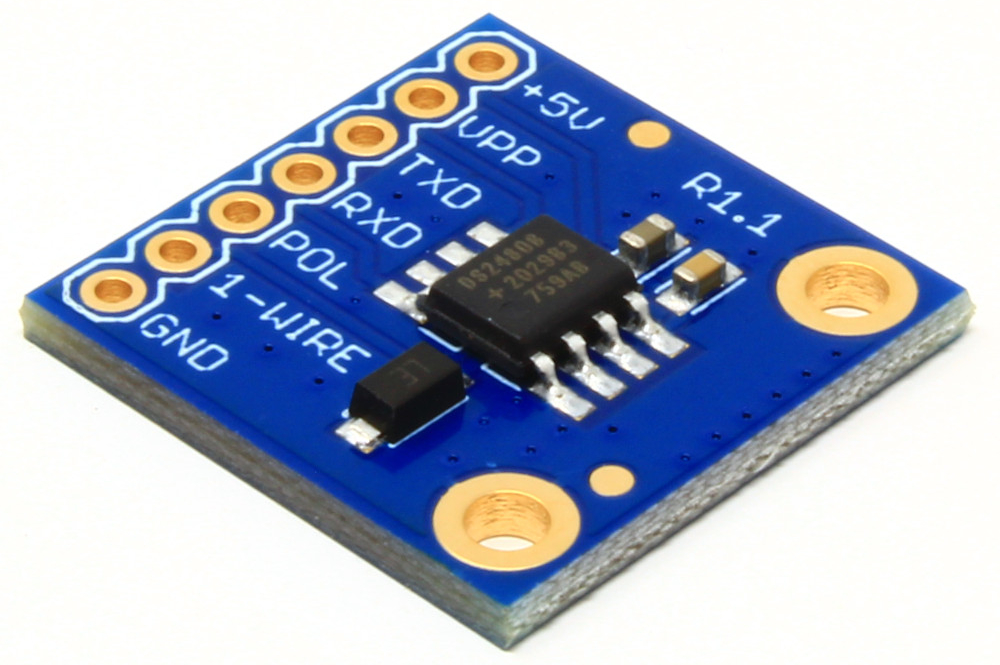
Artekit Labs AK-DS2480B-UART board.
If you already tried to implement the 1-Wire protocol by simply toggling a pin you probably realized that it requires a very strict timing, and basically when the 1-Wire communication is ongoing you had to prevent your program to do anything else but reading your 1-Wire device.
Here the Artekit AK-DS2480B-UART comes to the rescue. It mounts the Maxim DS2480B chip, that uses a simple serial protocol and manages all the complicated timings. You will place the AK-DS2480B-UART board between a host (an Arduino UNO, for example) and the device (or devices) you want to talk to (for example a temperature sensor).
In this guide we will learn how to connect the AK-DS2480B-UART and how to write a simple sketch to communicate with a 1-Wire device.
NOTE: If you are looking for a I2C to 1-Wire bridge, please check our AK-DS2482S-100 board.
Hardware & usage
The board comes with all the DS2480B signals exposed in one row of 1” (2.54mm) pins, that you can use with regular male headers.
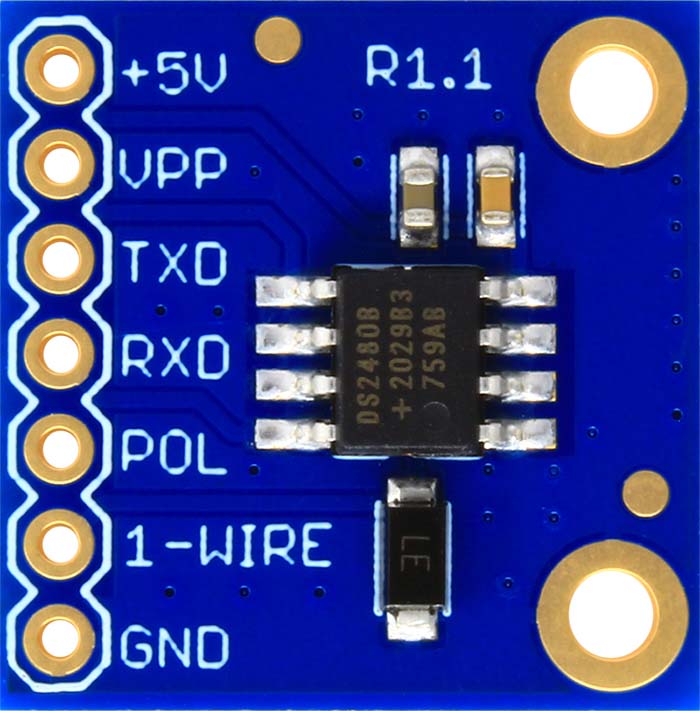
Artekit Labs AK-DS2480B-UART board, top view.
Board pinout
| NAME | TYPE | DESCRIPTION |
|---|---|---|
| +5V | Power | +5V External Power Supply |
| VPP | Power | +12V (Optional) external power supply for EEPROM Programming. |
| TXD | Input | Receive signal from MCU |
| RXD | Output | Transmit signal to MCU |
| POL | Input | TXD/RXD signal polarity. More about this here below. |
| 1-WIRE | Input/Output | 1-Wire bus |
| GND | Power | General ground |
Power supply
The AK-DS2480B-UART board works with a 4.5V to 5.5V power supply. You will supply this voltage to the +5 pin and connect the power supply ground to the GND pin.
RXD/TXD pins
The communication with the host device happens through the TXD and RXD pins. The mode of operation of the RXD/TXD pins is controlled by the POL pin. When POL is tied to ground, the RXD/TXD pins will use the active-high mode (±5V RS232 lines). This mode is typically used when connecting the board to a RS232 host, like a PC.
When POL is connected to +5V, the TXD/RXD pins will use the active-low mode, and can be directly connected to a +5V powered MCU or a board like the Arduino UNO.
The AK-DS2480-UART uses the “Host View” mode to name TXD and RXD pins, in which TXD is the input pin and RXD is the output pin.
If you need to connect the AK-DS2480B-UART board to an MCU powered below 5V, you can use a logical level converter like our Artekit AK-TXS0108.
1-WIRE and VPP pins
The 1-Wire devices are connected to the 1-WIRE pin. Note that the AK-DS2480B-UART board also provides the strong pull-up resistor needed to communicate with certain EEPROM and temperature sensors.
The VPP pin can be used to externally supply the +12V required to program EEPROMs.
NOTE: If the VPP pin is not used, it must be connected to +5V pin.
Typical connections
The following picture shows the typical connection with an Arduino UNO board.
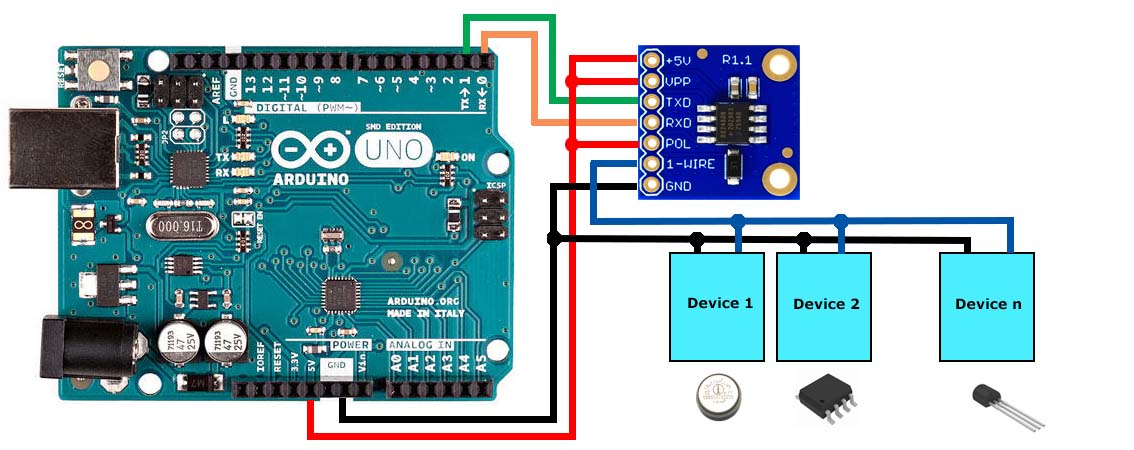
The AK-DS2480B-UART board connected to an Arduino UNO.
Example code
In this example we are going to use the AK-DS2480B-UART board and an Arduino to get the ID number of an iButton.
To use the following code you will need the DS2480B Library for Arduino that you can download from GitHub. Install the library by going into the “Sketch” menu, then “Include library” and then “Add .zip Library…”.
#include <DS2480B.h>

#include <AltSoftSerial.h>

AltSoftSerial altSerial; // RX 8 - TX 9

DS2480B ds(altSerial);

void setup(void) {
  Serial.begin(9600);
  Serial.println("Started.");
  altSerial.begin(9600);
  ds.begin();
}

void loop(void) {
  int i;
  byte data[12];
  byte addr[8];
  char output[4];

  ds.reset_search();
  if (!ds.search(addr)) {
    delay(100);
    return;
  }

  Serial.print("iButton ID = ");
  for( i = 7; i >= 0; i--) {
    sprintf(output, "%02X ", addr[i]);
    Serial.print(output);
  }

  Serial.println();
}
The connections for are the same as the ones shown in the Typical connections section, with the exception of the serial communication pins. The code here above uses the AltSoftSerial class to simulate a software serial port on the pins 8 and 9 of the Arduino board (this way you can use the Serial console to see the output result). Because of this, you have to connect the RXD/TXD pins of the AK-DS2480B-UART board to the pins 8 and 9 of the Arduino UNO, respectively.
If you open the serial console at 9600bps, you can see the output showing the ID of the iButton.
Started.
iButton ID = A5 00 00 00 1B 0D DF 0C
iButton ID = A5 00 00 00 1B 0D DF 0C
iButton ID = A5 00 00 00 1B 0D DF 0C
iButton ID = A5 00 00 00 1B 0D DF 0C
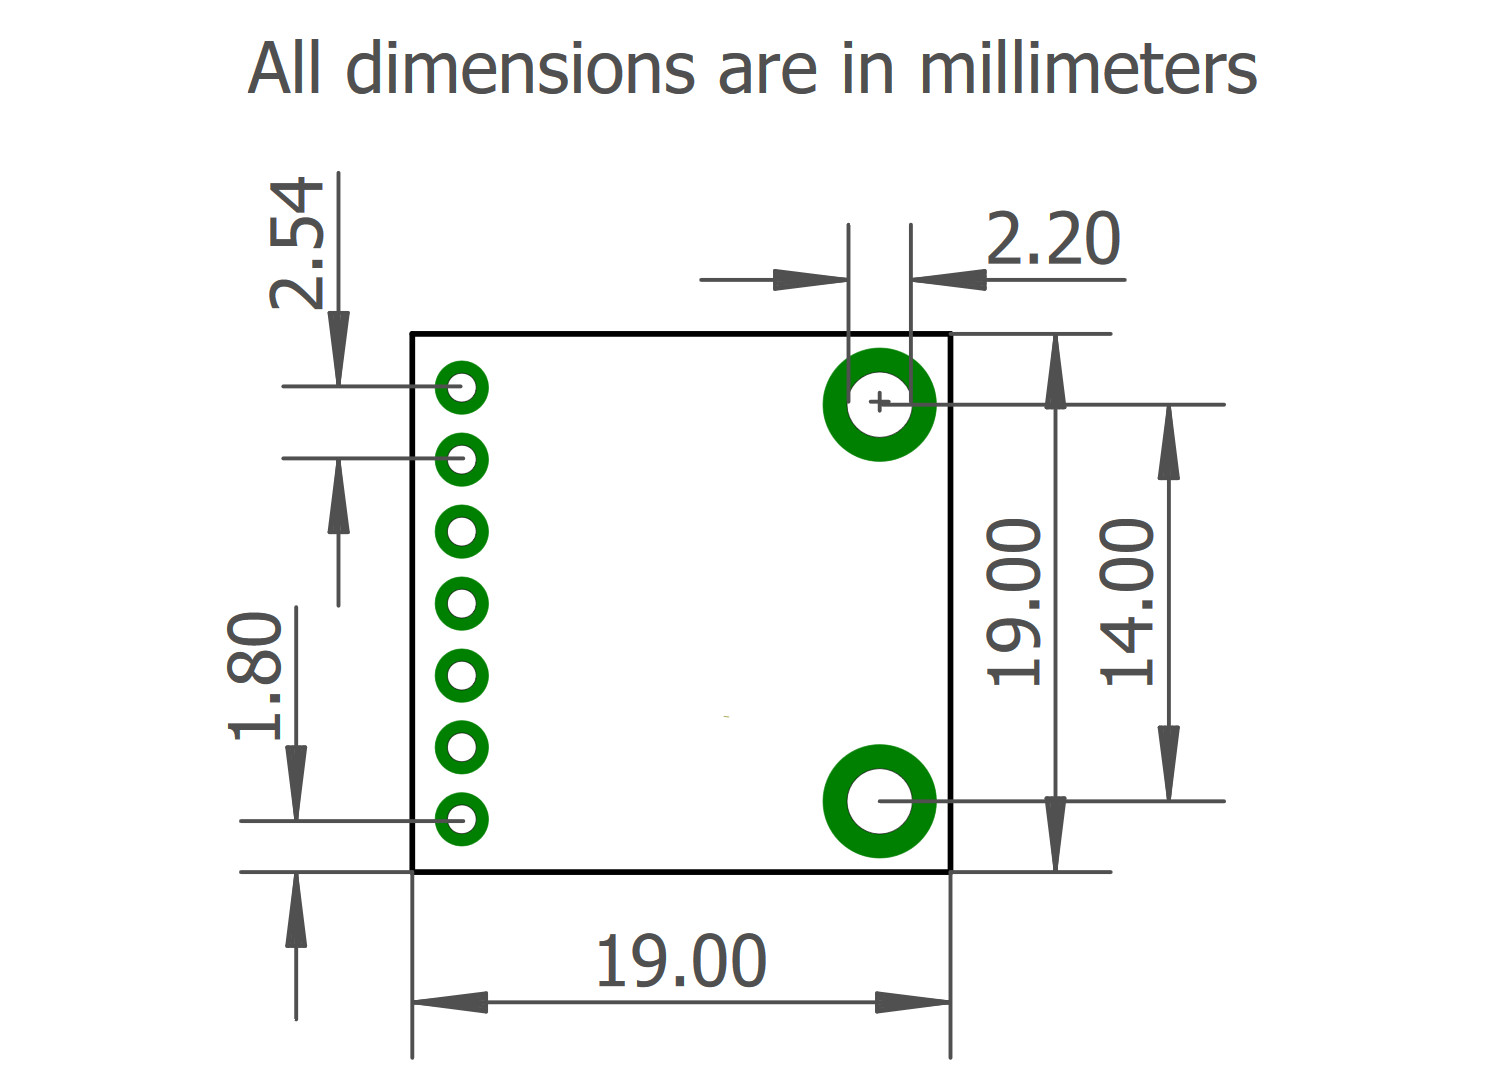
Board dimensions
