This guide shortly explains how to use the AK-3232 Level Converter. Let’s start with the basics:
Why do I need a RS232 Level Converter?
In general, you need a RS232 Level Converter when connecting the UART of a TTL device (for example, the serial port of your microprocessor) to a standard RS232 serial port of, for example, a PC.
This is because the voltage levels of the TTL device and a RS232 device are different: The TTL device “understands” voltage levels that usually go from 0V to VCC (VCC can be 3V, 3.3V, 5V, depending on your microprocessor). On the other side, RS232 devices “understand” voltages in the ranges of max. -25V to 25V (the RS232 standard specifies a maximum voltage of 25 volts: signal levels of ±5 V, ±10 V, ±12 V, and ±15 V can be used too).
What you can see in the picture below is an example of TTL signals (yellow) and RS232 signals (green):
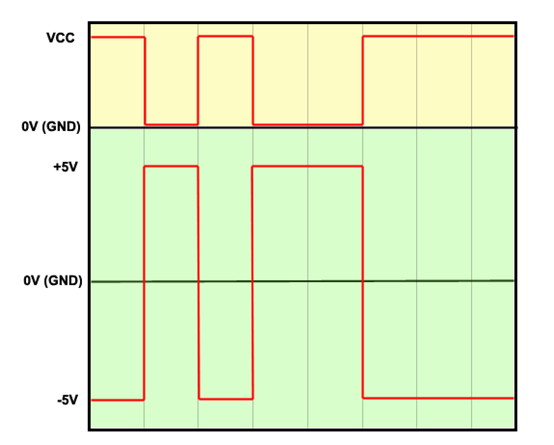
You may notice that another difference is that TTL devices interpret a logic 1 when the voltage is 0V, and a logic 0 when the voltage is at VCC. RS232 logic is different because a positive voltage means a logic 1 and a negative voltage means logic 0.
What the AK-3232 board does is to convert TTL signals into RS232 signals and viceversa.
Why the voltage levels are different?
TLL voltage levels are not immune enough to external noise. Data along TTL lines can only travel short distances. The voltage levels of a RS232 line allows data to travel distances up to about 300m (with good enough cables).
Hardware
Let’s take a look at the hardware: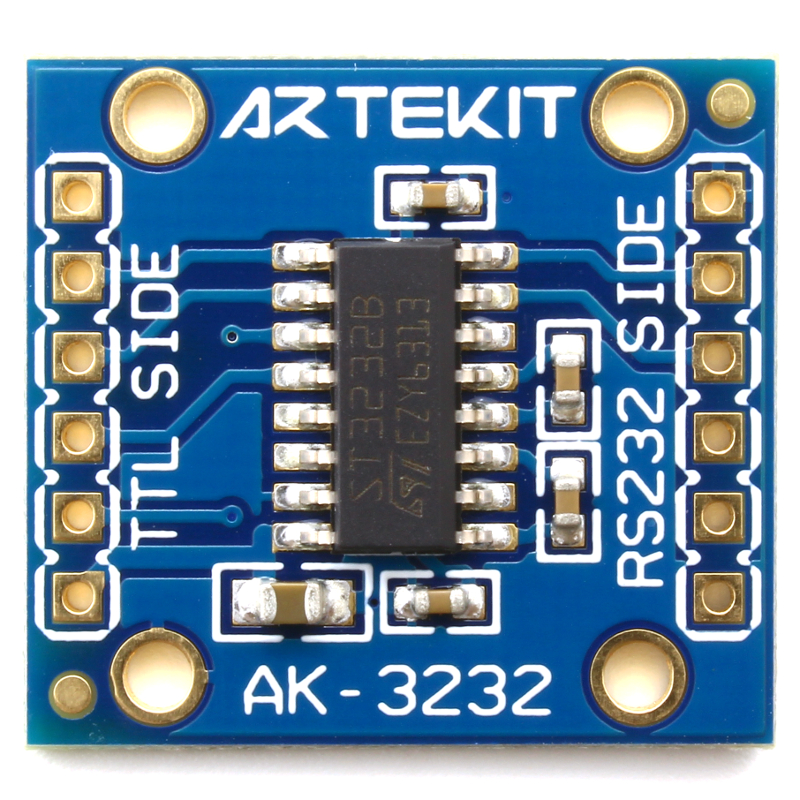
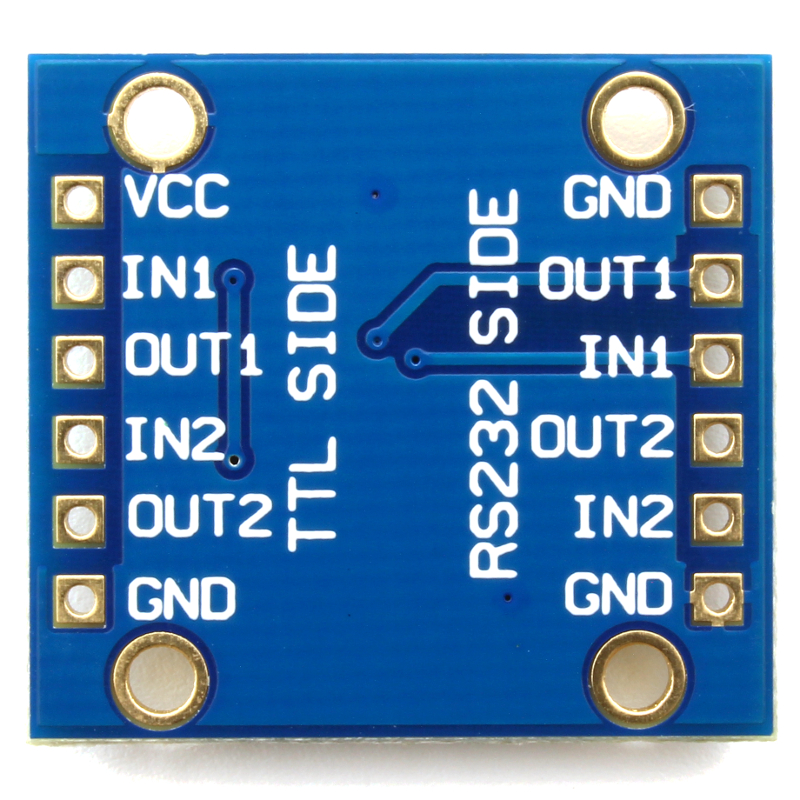
The AK-3232 is based on the ST3232 chip from STmicroelectronics. The board has 8 signal pins: 2 TTL inputs (IN1 and IN2 on TTL SIDE) and 2 TTL outputs (OUT1 and OUT2 on TTL SIDE). These are the pins you will be connecting to your microcontroller (the TTL device). The RS232 SIDE has two inputs (IN1 and IN2) and two output (OUT1 and OUT2). These are the pins you will connect to the RS232 device. VCC has to be connected to the VCC of the TTL side.
A signal connected to the IN1 of the TTL SIDE will be converted and output to the OUT1 of the RS232 SIDE. A signal connected to the IN1 of the RS232 SIDE be converted and output to the OUT1 of the TTL SIDE. The following picture illustrates this concept better:
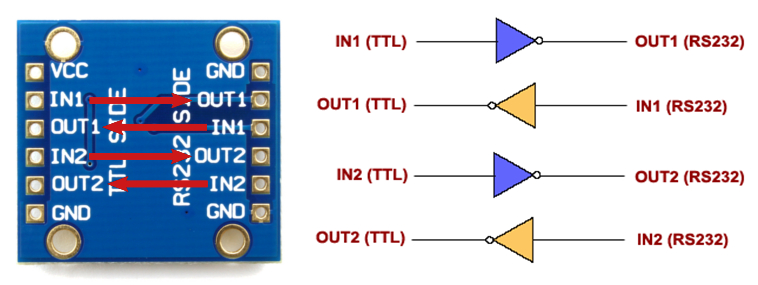
Characteristics
The AK-3232 board can be powered up from 3V up to 5.5V, on the VCC pin. The voltage applied to the VCC pin will be used to generate the RS232 output +5V and -5V signals. The AK-3232 can receive on the RS232 side up to +-25V (that is the maximum the standard allows).
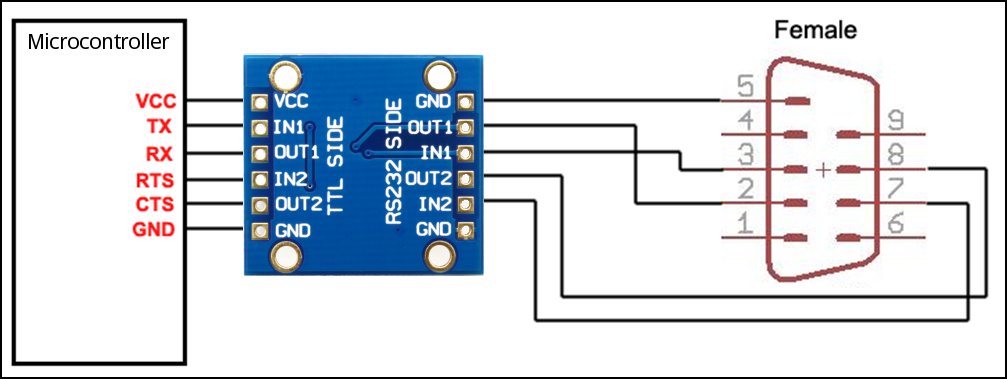
AK-3232 connection with flow control
The following illustration shows how to connect the AK-3232 board in a flow control configuration. Here we’ll implement the RX, TX, CTS and RTS signals connected to a standard DB9 female connector.
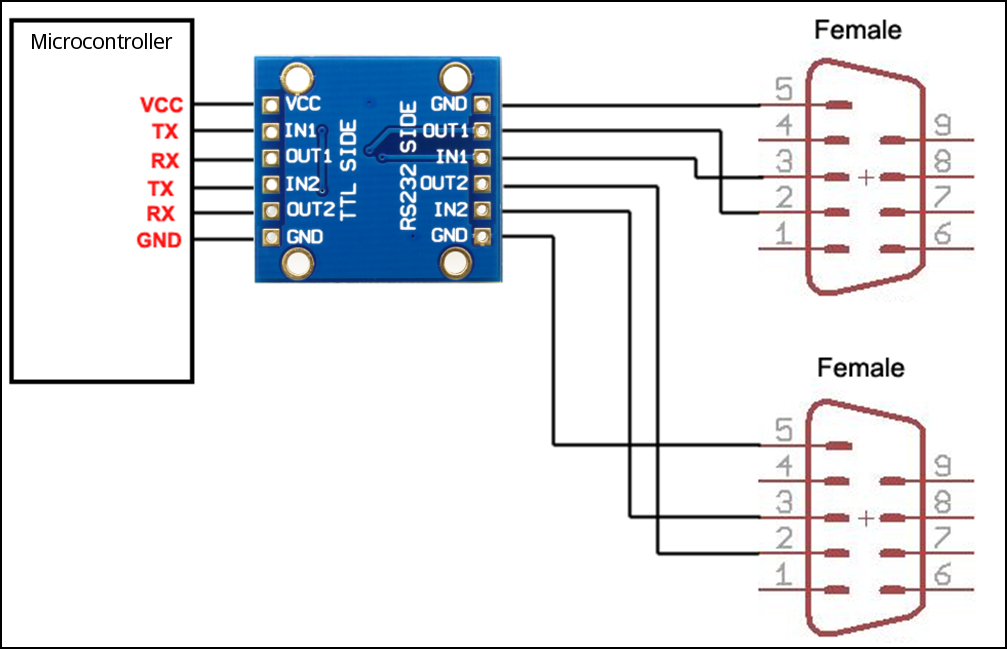
AK-3232 connection to two serial ports
Since the AK-3232 has 4 inputs and 4 outputs, it can be used to drive two serial ports with a single board. The following illustration shows how to connect 2 serial ports of a microcontroller to two DB9 female connectors.
Additional information
RS232 DB9 connector pin out
9 Pin D-SUB male connector at the computer. Direction is relative to DTE (computer).
| Pin |
Name |
Direction |
Description |
| 1 |
CD |
Input |
Carrier Detect |
| 2 |
RXD |
Input |
Receive Data |
| 3 |
TXD |
Output |
Transmit Data |
| 4 |
DTR |
Output |
Data Terminal Ready |
| 5 |
GND |
– |
Ground |
| 6 |
DSR |
Input |
Data Set Ready |
| 7 |
RTS |
Output |
Request to Send |
| 8 |
CTS |
Input |
Clear to Send |
| 9 |
RI |
Input |
Ring Indicator |


